Showing posts with label snacks. Show all posts

Wednesday, December 18, 2019

Achappam - Rosette Cookies

Achappam is one of my favorite Indian Snacks. The " achu" ( achappam maker )has been sitting in my kitchen since the last 4-5 years... I have never once dared to make this thinking it was a herculean task. Recently I watched Lakshmi Nair making these and it looked very easy. So this has been on my mind since I saw her recent vlog.

This morning I woke up thinking about achappam, and I did not want to push it any further. I went straight to the kitchen and started prep work for achappam. I watched her video again to get the recipe ( I tried calling my mom but there was no answer and I had to make it NOW !!!); I tried the proportion she mentioned in her video and I just wouldn't get the desired batter consistency. **So I made some alterations to her recipe to get the batter to a smoother consistency.


Here's mine :

Rice flour -  4 cups ( used Idiyappam flour as this was all I had at home) - mine was roasted flour
Eggs -  4 eggs ( This makes it too soft, limit to two; I used 4 which made the achappams not as crispy )
Coconut milk - Roughly 2 cups ( used the milk of freshly grated coconut)
Sugar - between 1/2 - 3/4 cups
Salt - to taste
Black Sesame seeds - 1 tbsp

Mix well, till you get a nice smooth batter, not too runny.

Tips:

  1. Heat oil really well. Let the achu maker be in the oil as the oil gets heated.
  2. Dip the achu in the batter, DO NOT let it reach till the top of the achu, else it will not come off easily when you dip it in the oil.
  3. Dip the achu with the batter into the oil and tap the achu with your other hand to facilitate the releasing of the achappam into the oil.
  4. Take the achappam off from the oil and let drain the extra oil off.
  5. Put the achu BACK into the HOT OIL and then dip into the batter for making the next one.
  6. Be patient, you can only make them one after the other. Else you should be one of those experts, which I am not.
https://www.facebook.com/180823332274899/videos/564421070792932/?t=5
********************************************************************************
**Notes: I figured out that when you use unroasted flour, you can stick to Laskhmi Nair's recipe as below:

Rice Flour unroasted -  4 cups
Eggs - 2
Sugar -  1/2 cup
Coconut milk - a little more than 1/2 cup
Salt  - to taste
Black Sesame seeds - 1 tbsp
*********************************************************************************
Valsa aunty, made  achappams for Christmas and they were really good too. Here is her recipe:

1 and half cup of rice flour( She had only Puttu podi which is more of a coarse powder, she ground it in the coffee grinder and made it fine powder)

1/2 cup of Maida

Egg - 1

Sugar - per your taste ( 1/2 cup )

Coconut milk - 1 can


Friday, January 13, 2017

Sukhiyan

This is no doubt one of my favorite snack. I never miss an opportunity to have these. Made it the other day, I couldn't stop until the last one was over.


Green Gram : 1 cup
Grated coconut -  1/2 cup
Jaggery - 1/2 - 3/4 cup grated
Cardamom powder - 1/4 teaspoon
All purpose flour / Wheat flour : 3/4 cup
Water - enough to make a thick batter with the wheat flour
Salt
Oil 

1) Boil the green gram with a little salt. Make sure it doesn't get mushy.

2) Mix the grated coconut, jaggery, cardamom powder and mix well with hand.

3) Now, mix it with the cooked green gram , using a spoon. You should be able to make round balls.

4) Dip it in the batter and fry them .


Enjoy them hot !!!!


Sunday, January 1, 2017

Flaky biscuits with chicken filling


This one reminds me of the chicken puffs I used to enjoy when I was in Kerala. Anytime I visited a Bakery, I always made sure to have one of these. Anns and Jocees were always my favorite, also enjoyed some from Best Bakery. Can't wait to eat some of those when I visit next time. 


You can try different fillings for these biscuits. I did it with chicken and this is how I made it.


Ingredients :

Onion - 1 small
Ginger garlic paste - 1/2 teaspoon
Red chili powder - 1/2 teaspoon
Tomato - 1 medium- chopped small
Hot Buffalo Sauce  - 5-6 splashes
Tomato Ketchup - 3-4 tablespoons
Chicken breast/thighs boneless - cooked with salt and pepper and then shredded
Cheese - shredded ( optional) [ I used parmesan, that was the only one I had]
1 Jumbo can of Flaky biscuit dough

Butter melted - to brush over the biscuits when its taken out of the oven.


Method:

Keep the cooked shredded chicken aside.
Saute the onions, ginger garlic paste in oil, until the raw smell goes.
Then add the chopped tomatoes and let them cook.
Add the sauces.
Add the shredded chicken and mix well.
Check the taste, adjust by adding salt or sauce to suit your taste.
Slice each of the biscuit dough in half and add the filling to it.
Follow the instructions on the biscuit can. Bake at 375 - 400 F for 15 minutes, till you see the biscuit is cooked.

Enjoy it hot.


Taking down christmas decorations is emotionally nerve wrecking for me for several reasons, first being the christmas hols come to an end and life falls back to normal routine...😢 , next reason, kids get older every year , thank God I don't age 😇. This time we had to open all the gifts by December 22nd, because my little K who is 3 would not stop rolling on the floor till I let her open the gifts five minutes after I put them under the tree...so, then, I let the other sweetie pies in the house open theirs too. Lesson learnt - next time definitely the gifts go under the tree only on 24th evening after she is gone to bed... so, this way the kids have gifts to open on 25th morning. 

The girls felt Santa was bored alone, so let Lissy and Sasha, their dolls give company to Santa 😉
(P.S. they know there is no Santa and he is not real, a good friend gave this guy to the kids and we just put him next to the tree to add some color ;) 


 So, what makes this " taking down christmas decorations " less painful and less emotionally stressful is eating some comfort food. :-), thats when I decided to try this one.

We also had some Ethekka Appam ( Pazham Poree/ Banana Fritters) and Cutlets to munch while taking the lights down ....


Monday, December 26, 2016

Carrot and Cashew nut cake

This is a super moist and tasty cake. If you are not a big fan of  the usual plum cake, this is definitely the one. I made a few of them during Christmas and gave it to a few neighbors and friends and I was so glad to find a cake tin to gift this in and I also had a cake pan that makes cakes that fits well into these " gift tins".

Here are a few pics...


Ingredients you need to get started

All Purpose Flour - 1 cup
Baking Soda - 3/4 tsp
Baking Powder - 3/4 tsp
Salt - a pinch
Vegetable/Canola Oil - 3/4 cup
Sugar - 3/4 cup
Egg - 2 large
Vanilla Extract - 1 teaspoon
Grated Carrot - 1 cup
Chopped Cashew nuts - 1 cup

Caramel

Sugar - 3/4 cup
Hot water - 1/4 cup


Method:

1) First prepare the caramel and keep it aside to cool. For this, heat sugar in a dry pan on medium heat, swirling the pan occasionally. Make sure you don't use a spoon to stir the sugar.

2) Make the caramel dark, make sure it does not burn. Add hot water to the caramel and switch off the flame. The caramel dissolves well. Keep it aside to cool.

3)Prepare the cake pan, by lining it with a parchment paper, use the parchment paper so that the sides of the cake don't get hard. Preheat the oven to 350 degree F/ 180 degree C.

4) Prepare the dry ingredients. Sift together flour, baking soda, baking powder and salt. Keep it aside.[ I do this in a medium sized bowl. I like to use the largest bowl I have for the wet ingredients for two reasons, one, so that the liquid won't splash out if you are using a hand blender and two, because you will eventually be adding the dry ingredients into the wet ingredients bowl ].

5)Beat the eggs and the sugar well, then add oil to this and beat till you get a creamy consistency.

6)Add the cooled caramel and vanilla essence to the above mixture and mix well.

7) Add the sifted dry ingredients to the wet ingredients and stir, not too much but just until everything is mixed well.

8) Add a teaspoon of flour to the grated carrots and chopped cashews and add it into the mixture and give a quix stir with the spatula.

9) Bake in the oven for 30-35 minutes, till the cake rises well, but make sure you don't over cook it else it will lose the moisture and cake will be dry. When the cake is cooled, enjoy it, its a very moist cake and tastes so good !


Let me show you a pic of the same recipe cake which I made with a lighter caramel. So, you can decide if you want a lighter one or a darker one, both are really really good.


Also, I made this cake in all different sizes of cake pans, here are a few pics...


They make such beautiful gifts too...


HAPPY BAKING, ENJOY THE CAKE AND GIVE IT TO SOMEONE YOU LOVE !
MERRY CHRISTMAS !!!


Monday, March 21, 2016

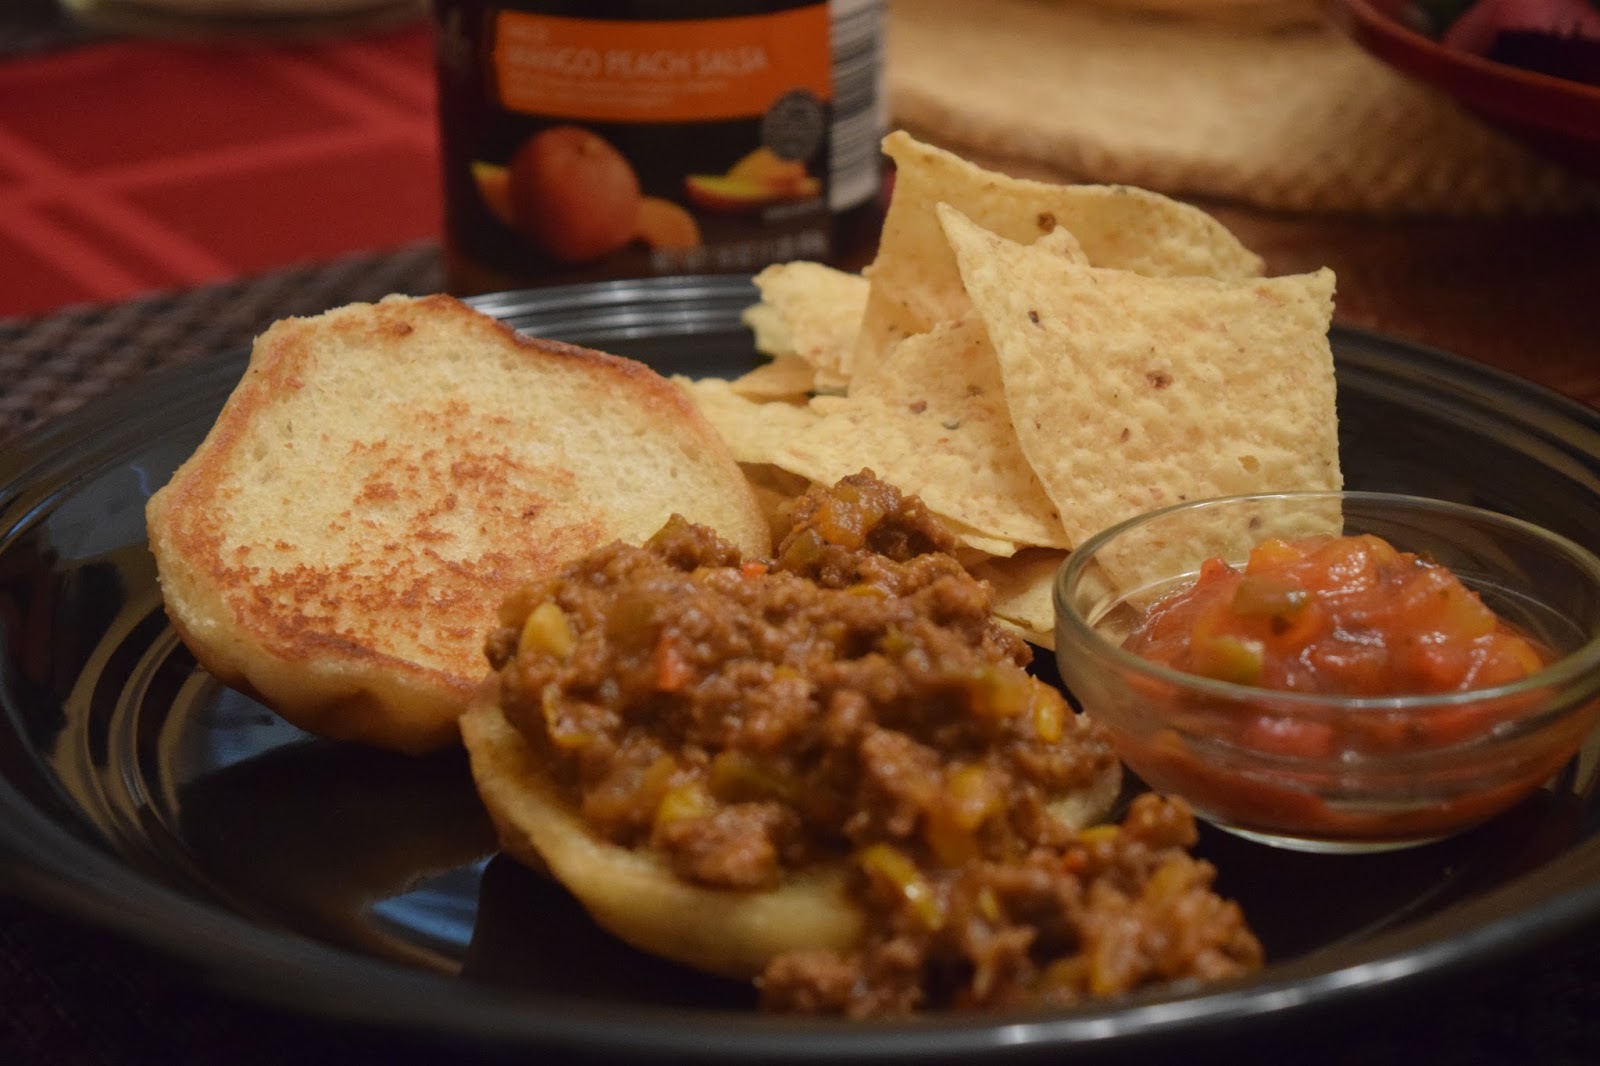
Sloppy Joes


Beef - 2-3 lbs
assorted peppers -5-6 ( small ones)
1 - onion
garlic cloves -5-6 minced
ketchup - 3-/4 cup ( if you can't handle the sweet taste go for 1/4 Hot chili ketchup and 1/2 normal Ketchup)
Brown sugar - 2 tablespoons
Chilli powder - 2 teaspoons
Pepper powder 1/4 - 1/2 teaspoon
Red pepper flakes - 1/2 - 1 teaspoon
Worcestershire sauce - 5-6 dashes
Tobasco sauce - a few dashes
Salt - taste
Butter - 1/4 stick


Brown the ground beef.
Drain off the fat.
Add the onions and chopped peppers
Add the minced garlic
Add the ketchup and sauté. If it starts sticking add 1/2 cup water
Stir well.
Then add the brown sugar, chili poser, pepper powder, red pepper flakes, Worcestershire sauce, salt.
Cook on medium low covered for 15-20 minutes.
Add butter on the skillet and brown the rolls or bun.
Sppon in the meat mixture. Enjoy it with some chips :-)

Tip from pics...


Monday, March 14, 2016

Pitta Pizza

Pitta Pizza.... its a Saturday Nights thingy !!! Specially when you are sitting with kiddos and enjoying  a family movie time

Just throwing some ingredients together in the oven... will get you this perfecto disho for a Saturday Nighto !!!


Pita Bread
Pizza Sauce
Mozzarella Cheese
Sharp Cheddar Cheese
Olives
Assorted Peppers

Basically any other topping you want : Mushrooms Hard Salami, Bacon, Meat balls, sausages ... whatever comes you way, put it on top of the Pitta and enjoy your Pitta Pizza Saturday Movie night !!!

PS. Bake in a Preheated oven at 425 Degrees F, will cheese melts . Add only pre-cooked meat !!!


Saturday, March 12, 2016

Parmesan Sesame Chicken Strips

These are so easy and so yummy ! The recipe calls for Ritz Crackers as the outer coating and I thought that was a joke until I tried them ! Its truly out of the world ! And I think I am going to buy some more Ritz crackers just to use them for more recipes !

This whole thing takes just 30 minutes to make...

Here's what you need...

25-30 Ritz crackers
1 cup mayonnaise
1/4 cup sesame seeds
1/4 cup grated Parmesan cheese
4 boneless skinless chicken breasts
Pepper - 1 teaspoon
Salt - go easy on the salt, as the Ritz crackers already have salt in them.

Preheat oven to 425 degree F.
Keep the baking tray ready by spraying some nonstick cooking spray
Cut the chicken breast into long strips.
Marinate them with a little salt and needed pepper.
Place the crackers in a ziplock bag or any plastic bag and crush them with a rolling pin until they are fine crumbs ( I love doing this part ;) )
In one bowl have the mayonnaise, and in another bowl, mix the crackers, parmesan cheese and sesame seeds.
Dip the chicken strips into the mayonnaise and then the crumb mixture.
Spread them on the baking tray and bake for 15-20 minutes.

Enjoy it hot with some ketchup or some honey mustard !

Get some Tips from pics below:


Wednesday, March 9, 2016

Cheat Pizza

So what do you when your kids crave for some pizza ? I tried this once at home and I am so glad I did , coz most of the time, when the kiddos are in a pizza mode, I don't have to order one or go and pick one. Here is an easy peasy Cheat pizza recipe...


Preheat oven to 350 degree F.
Any bread ( French bread or Italian bread ).
Slice it to 3/4" thickness
Spread them on your baking tray.
Put some butter for extra taste.
Top it bread slices with some marinara, mozzarella ( i added some sharp cheddar too, if you don't have forget it ), pepperoni or any topping of your choice.
Bake it in the oven till cheese melts.

Give it to kiddos and see the smile on their faces... ;-)

Steps :-)